Lasagna a la Uncle Scooter

Welcome back, gentle readers!  I’ve been away from the computer (and the kitchen) for a little while as I’ve been settling into my new role as the gm for Firefly, a landmark neighborhood institution here in San Francisco.  Now that I’m fully plugged in, I wanted to get back to feeding you, too.

Lasagna, for me, falls into a special category of foods; good today, better tomorrow.  So when I can, I get started on this dish a day in advance.  However, pulling a dish like this together and not eating it, requires more will power than I have the time to cultivate.  Ah well.  This style of lasagna, bound together with a cheesy sauce, was introduced to me by Michael Park back in the day.  I don’t make it any other way now.  Also, I like the “no boil” noodles, but do what your heart wants.  Let’s jump right in –
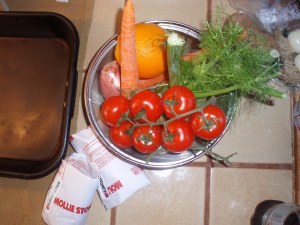
When I make a lasagna, I like to make the sauce separately.  In this case I made a pork and beef red sauce, with onion, garlic, carrot, fennel, and orange.
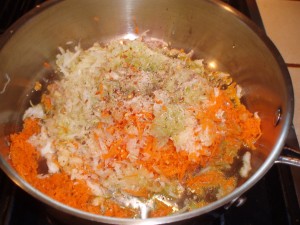
Here’s the soffritto shot.  In the French tradition, the aromatic base for a dish is mirepoix, (onion, carrot, celery) in the Italian tradition; soffrito (onion, garlic, carrot, fennel, other tasty things).  The Italian style uses olive oil, but the principal is the same for both, sweat some tasty bits of vegetables until they are soft and sweet and delicious.

Next, brown the meat(s), deglaze with a little wine and reduce that wine by half.  Then I added the tomato product and aromatics.  Fresh oregano and a little orange zest went in the pot.  Next up, cheese sauce!

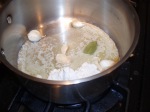
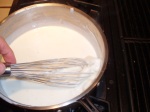
By my count, we’ve seen the above process (or some variation) fifteen hundred times already at swfoodworks.com.  We do however have a technique newcomer; singer (sawn-jay).  Here’s what Larusse has to say:  “Singer  A French culinary term meaning to sprinkkle ingredients browned in fat with flour before adding liquid (such as wine, stock or water) to make a sauce”.  But that’s not all, “[t]he term previously meant to colour a sauce with caramel, which was familiarly called jus de singe (‘monkey juice’)”.  Which only reminds me of Eddie Izzard’s Dressed to Kill monolouge in french.  I’ll spare you the laborious reading, and point you here if you have questions about what makes a roux, bechamel, or mornay.  I’m making a quart of sauce, so I started by sweating some garlic cloves and bay leaf in a couple table spoons of butter.  When that smelled great, I sprinkled a couple of heaping table spoons of flour in the pot and whisked it around for a few minutes.  Then I added the quart of whole milk and stirred until the whole mess thickened.  Voila!

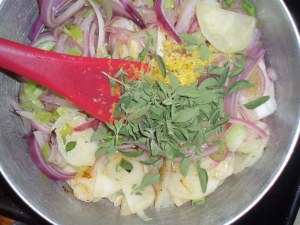
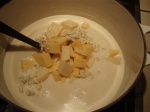
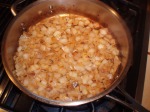
For the lasagna proper, I wanted to make a vegetable filling of potatoes (above sauteed with garlic), red onion, oregano, and citrus zest (below, in the bowl).

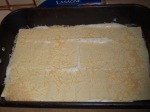
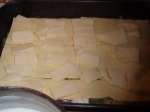
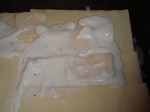
Now that the meat sauce has simmered and is delicious, the bechamel is prepared, and the filling is ready, we have to assemble the dish.  I have some fresh mozzarella to add some cheesy-body and I wanted to add a little ricotta along with the filling.  Here is the assembly process in photos, and the directions in haiku:

Sauce, noodles, filling

cheese, sauce, noodles, cheese, filling

cheese, noodles, sauce, cheese

Of course, please finish with seasonings (salt, pepper, nutmeg?), wrap with foil and bake in a hot oven (350 or so).  Peek under the foil after an hour to see how everything is coming along.  If the sauce is bubbly, you’re good to go.  Remove the foil and bake (or broil) looking for a nicely browned top layer.  Comme ça.

Now, let that steaming tray of delicious sit on out and start to cool.  If you can stand it, wait for several hours before cutting out a slice and making lunch.  If you can not, at least wait while you set the table.

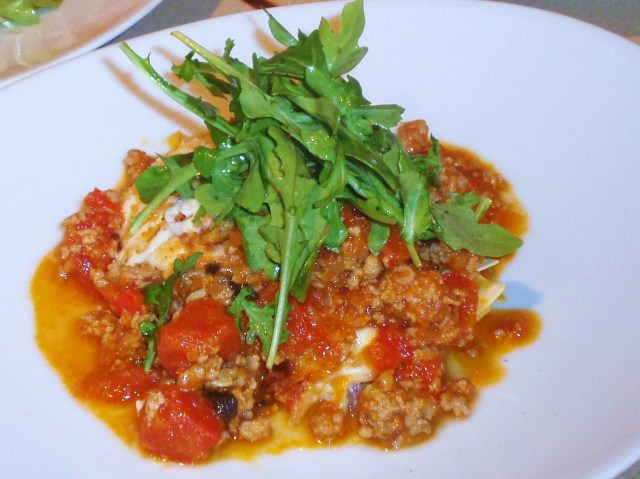
Then, heat up your ragout, cut out a slice, and sauce the noodles.  If you are making this plate after the lasagna has had a chance to rest, it’s easy to heat up the individual servings on a sheet tray or small oven proof dish.

No fancy wrap-up for this posting.  I just want to wish the best for your family, friends, health, and happiness.  Au revior,  Scott.

The Lovely and Versatile Almond Biscotti (at home)

If you find yourself paying $2.75 for a biscotti every time you step into your local coffee haunt, calm yourself.  Help is at hand.  Not only are biscotti fairly easy to make at home, but they keep forever, and (over time) you may be able to recuperate the cash you’ve been throwing at someone else’s biscotti.  Yours are better anyway.

Here’s what you’ll need to make these:

  • 3 eggs
  • 1 cup sugar
  • 1/2 vanilla bean (just the insides) or 1/2 tsp. extract
  • 1/8 tsp. salt
  • 1 tsp. almond extract
  • 2 cups AP flour
  • 1 tsp. baking soda
  • 3/4 cup sliced almonds

I like to throw a little orange zest into the mix as well, but we’ll get there in a second 🙂

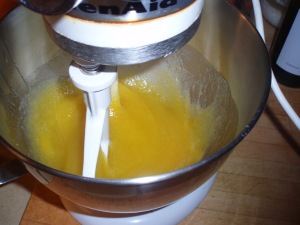
Start by beating together the eggs, sugar, vanilla, and almond extract.

Combine it well.

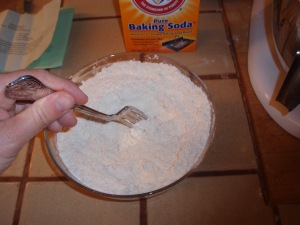
Stir together the ‘dry’ portion; flour, baking soda, salt.

Combine the ‘dry’ and ‘wet’ portions on a low speed.  Here I’ve thrown in the zest of one orange also.

There we go.

Once the ‘dry’ ingredients have been incorporated, add the sliced almonds and continue mixing until incorporated.

You’ll end up with something that looks like this; a very sticky, slow moving batter.

*Very Important* Flour some parchment paper really well.  This batter is sticky, and it needs a lot of help.

Turn the batter out onto the floured parchment paper lined sheet trays.

Use the parchment to help you bring the batter together and flatten it out slightly.  More flour may be required.

Kind of like this.

Now, shape the dough into pretty good rectangles, about 1/4 inch high.  (Keep some flour near by if your hands get sticky)

Pop that into a 350 degree oven for 17-20 minutes.

Remove when they look nice a lightly golden brown(ed).  Let this cool for about 5 minutes.

Get a serrated knife, move to a cutting board, and slice the ‘loaf’ into 1/4 inch slices.

Turn the oven down to 300 degrees and pop these guys back in for 10-20 minutes.

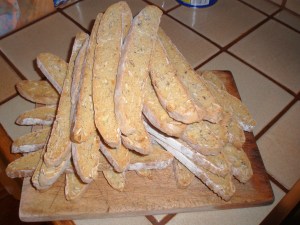
They should be nice and tan, and have a crisp, light texture.

This recipe yields about 20 biscotti or so, at about $.13 a piece.  This, as you already know, are a great any-time snack.  Biscotti also work well crushed up for pie crusts (hello!).  I brought these to work this week, and one of our talented line cooks (Hi Hank) turned them into the crust for our staff meal cheesecake.  We used to use them the same way back at Restaurant Vintage Park in Nebraska.  Biscotti crust, mascarpone cheesecake, lemon curd to glaze; Lovely!  Great with a nice coffee, and traditionally served with a sweet wine called Vin Santo (wine of the saints), these classic twice-baked Italian treats are great to keep around.  Good luck keeping them around.

Treat yourself well –

-Scott

Baked Rigatoni with Three Cheeses

“Like cheese and macaroni” is an Italian idiomatic expression used when two things work together harmoniously, naturally, and effortlessly.  I would add deliciously to that list.  Cheese and noodles are really satisfying together, but you already know that, don’t you?  🙂  I’m a big fan of baked or broiled noodle dishes.  This last step adds other dimensions of flavor and texture, and it’s pretty simple to execute.  So let’s jump into this version of cheese and macaroni!

Here’s the shopping cart; mushrooms, sausage, onion, garlic, parsley, and three cheeses (blue, fontina and Gouda).  I like the cheese trifecta.  The fontina melts well, gouda lends body and sweetness, and the blue gives a punch of salt and savor.

Here’s what you need in order to make a cheese sauce at home.  Essentially, what you’re making is a cheese rich bechamel sauce.  Bechamel is a milk sauce that is thickened with roux.  If you need roux tips, look here.  I little tip I always remember for bechamel is that one ounce of roux with thicken one cup of milk.  So for this batch I used four ounces total (2 butter, 2 flour).

Once you get your white sauce up and running, get that cheese in the works.  For a quart of sauce, I started with about two cups of cheese business.  Stir the cheese into your warm sauce, and season with a little of whatever you like.  I like nutmeg and cayenne, salt and black pepper.

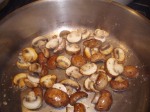
And here’s the other stuff that makes eating pasta so delicious; mushrooms, onion, and sausage.  If you buy little closed mushrooms like the ones here, I always wash them off before I proceed.  If they are wild, or have exposed gills, I brush, or wipe, or pick them clean.  When I can, I like to use one pan for this part, so I start with a good high-heat saute on the mushrooms until they color, and then I bring the onions to the party.  Last, I give the sausage a little time in the pan to color and develop flavors.

The, I like to drain all of the ‘garnish’ so that I’m not diluting my delicious cheese sauce with the moisture that the veggies are giving up.  It’s all about the little thing…

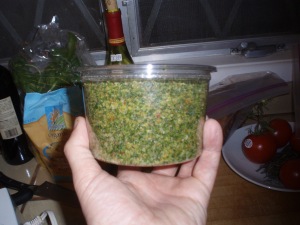
You could use standard bread crumbs for dishes like these or you can dress them up a bit.  This version is a parsley bread crumb.  When you get herbs, be sure to wash before using.  I know they look clean and all that, but there’s almost always dirt there, I assure you.  Use a big bowl, and shake the herbs around.  Then, drain them and spin them dry in a salad spinner like the crazy yellow one above.  If you find yourself stranded on a small desert island with no herb spinning device, use a colander and then roll the herbs in some paper towels or a clean kitchen towel, and give them a good squeeze to absorb the water.

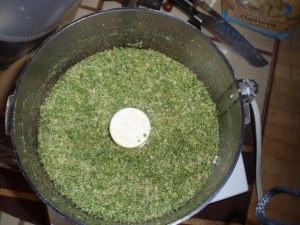
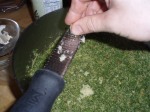
This is a quick way to chop the crap out of some parsley, and then make tasty bread crumbs.  Toss the parsley into a food processor, and pulse it until the pieces start to get small.  Then, throw in some of your bread crumbs, which will help get everything chopping.  Once everything is the size you want, add the remaining bread crumbs and pulse a couple of times to incorporate them.  Oh, start boiling some water, it’s almost time to eat!

Now, take a minute to make them really delicious.  Add a little garlic, some olive oil, and grated Parmesan, then taste, and season with salt and pepper to your liking.  You can turn on the broiler at this point, too.

I made a whole mess of this stuff, so I saved the rest for later (on gnocchi, and on baked eggs, and to thicken a soup).

Now we just need to bring everything together.  Add the garnish to the cheese sauce, incorporate them well, and check the flavor.  Adjust the seasoning, and make sure the sauce is delicious.  I added a little Tabasco and cayenne in the end.

For this dish, I wanted almost equal volumes of noodles and sauce.  I also had some fresh basil kicking around in the vegetable drawer, so it went into the mix, torn into bite-size pieces.  Then I added the warm sauce to the hot rigatoni and tossed it all together.

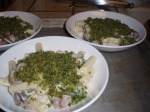
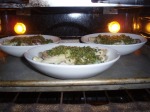
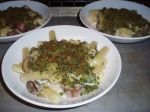
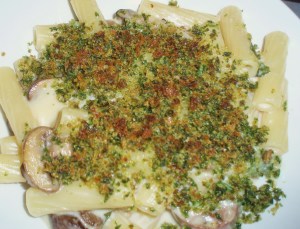
Here’s the last step in the dish.  I plated the pasta, and covered it with the parsley bread crumb mixture.  Then I popped it into the oven, under the broiler.  When the bread crumbs were toasty and delicious looking, I pulled these guys out, and we went to town.  Be sure to keep an eye on them in the broiler, once they start to brown they can go from delicious to burnt pretty quickly.

While it may not be the macaroni and cheese that some of us grew up eating, it is a tasty variation that is open to interpretations.  My friend Shane still remembers the mac & cheese we used to serve him at my first (real) restaurant job in Nebraska.  That was over ten years ago, folks.  Powerful stuff.  I hope you find some tips or ideas in this episode to turn up the volume on your next cheesy pasta moment.

Be well, and eat well-

-Scott

Braised Duck with Tagliatelle

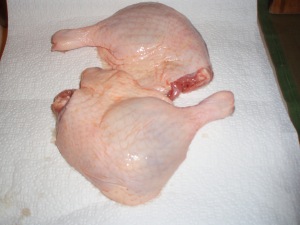
I can’t stop braising.  It may be an illness.  I’m not really looking for the cure right now, I’ve gotta tell you.  Freakin’ loving it.  And here’s another set in the braising parade; duck legs.  If you don’t or can’t find duck legs, chicken (heck, even turkey) legs are fine substitutions.  Another point of interest here is that I braised the legs in some soup that I had made a couple of day ahead.  The soup was a kind of Italian vegetable number, and there was more than we needed.  I strained the vegetables out and used the liquid for the braise; then I added the vegetables back in as a garnish for the finished pasta.  Here it comes:

Like any meat that is going to be browned, it may help to give the surface a little pat with a paper towel to ensure that it’s very dry before it goes into the hot fat.

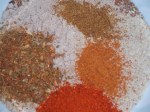
For these little guys, I have a blend of clove, black pepper,  fennel seed, chili flakes, salt, and nutmeg.  Season the legs well, and get the pan going on an high heat with some oil, to start the searing.

Brown each side of the legs so that you develop the flavor of the meat.

Here I am deglazing the same pan with a little seasonal ale from Sierra Nevada, and also throwing in some whole smashed cloves of garlic.  Be sure to reduce the alcohol by half before proceeding, in order to reduce the bitter taste.

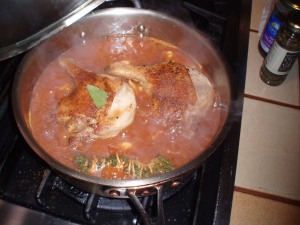
Now I’ve strained the Italian vegetable soup into the braising pan, reserving the vegetables for later, and added a little bunch of wound up thyme.

I added a little bay leaf, brought the whole mess to a simmer, reduced the heat, and put a lid on it.  I came back to check it in 45 minutes.

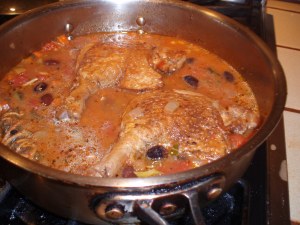
When the leg meat is getting close to perfection (super tender, that is), I returned the soup vegetables to the party and added some capers and pitted olives as well.

Once everything was in place, I boiled the noodles, tasted the sauce to correct for seasoning,  and then tossed the noodles in the braising liquid with the vegetables.

To finish the plate, I brought everything together, and added a little creme fraiche that we’d recently made, and a dusting of both cracked black pepper and Parmesan.

I’m not sure if there are any great lessons in this post.  I just wanted to offer some thoughts about how to use what you have on hand to make something tasty and satisfying.

Happy Cooking, Happy Eating-

-Scott

Steak and Two Bean Chili Soup

There will be no recipe for this chili.  Sorry, recipe lovers!  I will however try to break up this pretty simple recipe in to little sections that make sense.  If you have a family favorite recipe, there might be some ideas in here to spice it up a little!  I like to think of chili soup as a braised (or stewed) beef (I like chopped up stew cuts) with vegetables and beans used as a garnish.  And that’s how this version came to life.

For the meats, and chili is all about the meats for me, I like to make a dry mix of spices, sugar, and salt.  Here there’s allspice, cinnamon, peppercorns, raw sugar, and star anise.  I also made another powder from coriander, fennel seeds, salt, chili flakes, and celery seeds.

After you have the ground spices going, mix them together.  As a last touch I like to add some espresso powder.  Cut up the steak(s) in to bean-sized pieces and set this all aside.

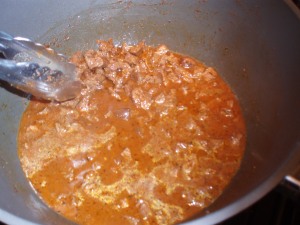
Combine the dry mixture with the steak bits.  Get a big-ass pot hot with some oil in it, and start searing the meat.  As it cooks the liquid will release and combine with the dry rub to make a  saucy looking mixture.

Add some chicken stock now, to calm down the cooking process.  We essentially want to braise (or stew) the beef at this point.

In a separate small pot add some smoked meat (these are smoked turkey necks from Nebraska), some stock (I used some veal stock from More Than Gourmet) and enough water to cover the smoked meat.  Bring this to a gentle simmer and let it simmer until the following steps are finished (30-45 min).

Meanwhile, caramelize some chopped onions pretty hard (with high heat and a little oil), then turn down the heat and add coarse chopped garlic, and diced Fresno chilies (or others if you like).

Once the vegetables are soft, add a small can of tomato paste and cook out some of the moisture.  Whisk some chicken stock into the vegetables to loosen the tasty seared bits.  Then, transfer the contents to the main pot.

Here is a look at the chili with all the garnishes added.  There are black beans, kidney beans, vegetables, fire roasted tomatoes, smoked turkey stock, and lots of flavor.  Once everything has come together in the pot, I bring it all to a gentle simmer for 20-30 minutes before serving.

This soup was nice and chunky, like I like it.  There was a nice depth of flavors throughout, and pleasant (but not overpowering) heat.

It was such a great day for taking photos in the kitchen, I couldn’t help myself.  Here are a few more!  I hope you found something fun in this cooking slide-show.  As always, I’m happy to answer any questions about this dish or others you come across.

Be well, and eat well–

-Scotty